Thursday, January 26, 2023

New decks for bulkhead flat cars

I recently installed some new, more realistic looking decks on my bulkhead flatcars.  I purchased these directly from Micro-Trains.  They appear to be printed images on thin, laser cut wood.  One package is enough to do 3 cars with each having separate pieces for the main deck and the bulkheads.

After taking them out of the package and separating the parts I found the main deck piece to be just a bit too long for the decks on my cars.


This was corrected by sanding down just a bit at each end of the deck. 


The edges to me looked a little too light when I test fitted the decks on the cars so I darkened the edges with a black sharpie pen.


Avery stick adhesive was used to attach the deck pieces to the car.


Here is a comparsion of one of the finished cars and another one yet to be done.  I am pleased with the results and since I don't currently have many loads that I would place on these cars having a more realistic deck makes a difference.


Tuesday, December 20, 2022

Winter 2022 layout construction update

We got our coldest weather a bit early this year with it getting into the 30's since Thanksgiving.  So I've been running the little heater and spending quite a bit of time in the train room and getting a lot done at the eastern end of the layout.

As mentioned in the previous post, the completion of the east end return loop means that the entire main line is now done.  This first photo shows the return loop with the pair of stub end staging tracks in the middle.  This area is directly above the Weso section of the layout and is at 68 inches from the floor.  This happens to be my height and I can easily reach this with a short step stool.  Trains that come into those stub end staging tracks will need to have there engines and caboose swapped by hand.


This next photo shows the entry into this area which is at the top of the helix.  The arrangement of the turnouts allows for a train to enter or leave the staging tracks from either helix track.  In practice they will mostly enter from the eastbound WP/UP line and depart from the westbound SP line.  I had a box of used Peco turnouts that had been given to me years ago and selected 4 that appeared to be in the best condition.  So far they are working well but all of these are just track nailed down so future repair or replacement is possible if any problems occur.


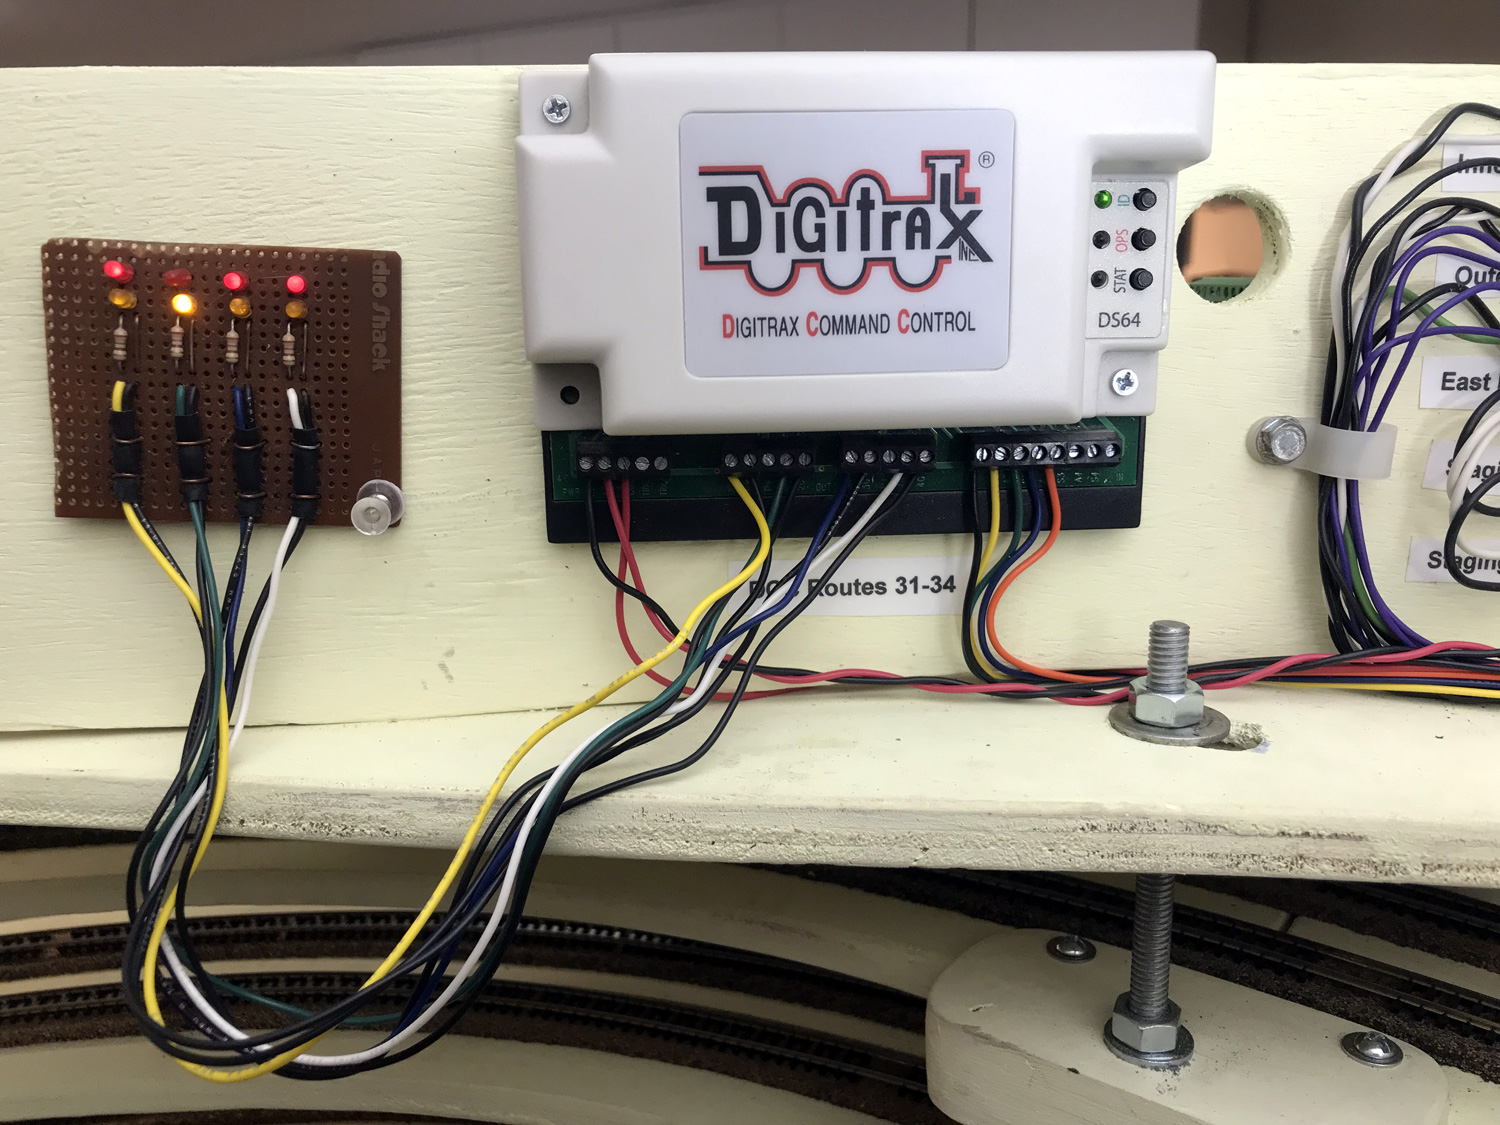
The short wall that is visible behind the Tortoise motors is to allow mounting of circuits and connections related to this area.  In this next photo some of this is visible including the Digitrax DS64 that controls the turnout motors.  Wiring is still in progress at this point.  The circuit board shown connected to the DS64 outputs is a test board I made up to assist with programming.  The Yellow LED's indicate a closed turnout position and the red ones indicate a thrown position. 


For now at least this group of turnouts will be controlled by this control panel which is currently mounted on a scrap of hard board which is attached to the helix.  Eventually the fascia will be extended from the left and this panel will be mounted to that.


Again this winter I am posting in the Trainboard.com annual winter layout party thread.  There have not been any train shows again this year for me to exhibit my Ntrak modules or AsiaNrail modules.  Two events are scheduled next year in April and June but until then I'll just keep working on this layout.

Saturday, December 10, 2022

Main line completed

With the completion of the upper east end return loop and it's pair of spur staging tracks, all of the track on this layout has now been completed.  It has taken just over 8 years to reach this milestone.  The photo below shows the location on the return loop where the last spike was installed.  This does not mean the layout is finished.  There are still structures to build for Carlin, scenery to finish and improve on in various places, and quite a few other features I want to add.  A layout is never really finished.


Saturday, December 3, 2022

East End Helix and Return Loop

Over the past couple of months I have been building the helix that will carry the eastern end of the layout up to a return loop above Weso.   This helix is stacked upon the almost identical lower helix and uses the same 5/16 all-thread rods.   Being identical, the details of it's construction can be seen in this series of posts from when the lower helix was built.   This new upper helix is now complete and has been connected to the return loop section of bench work that was already above Weso.  I ended up lowering that section about 1-3/4 inches to line up with the top turn of the helix.


There is not room on the return loop section for a double ended staging yard but I did want to have some sort of staging there so I came up with a couple of ideas as a compromise.  First, there is enough room to have stub end staging for the typical train length run on this layout.  Using 4 turnouts a train will be able to enter or leave either one of two staging tracks.  I am currently working on a control panel for this and the graphic below shows this.


The hex shaped object with the red center represents a push button to route a train around the loop.  The pair of hex shaped objects with gray centers below that represent momentary ON-OFF-ON toggle switches that will route a train into or out of each siding.  A dead section at the end of each siding will stop the train.   The locos will have to be manually moved to the other end of the train.  All of the green indicator LED's show the routes.

The second idea I am going to try is to have up to two trains using the loop as serial staging.  That is what the red LED's and the toggle switch on the far right are for.  This will be covered in detail in future posts.

Wednesday, November 23, 2022

Update to the yard sequencer

About 2 years ago I added some automation to the Southern Pacific staging yard using some Azatrax IR detection modules. The idea was to have a train enter the yard and stop on one a particular track and another train automatically leave on another track.   The post I made on this in November 2020 is HERE.

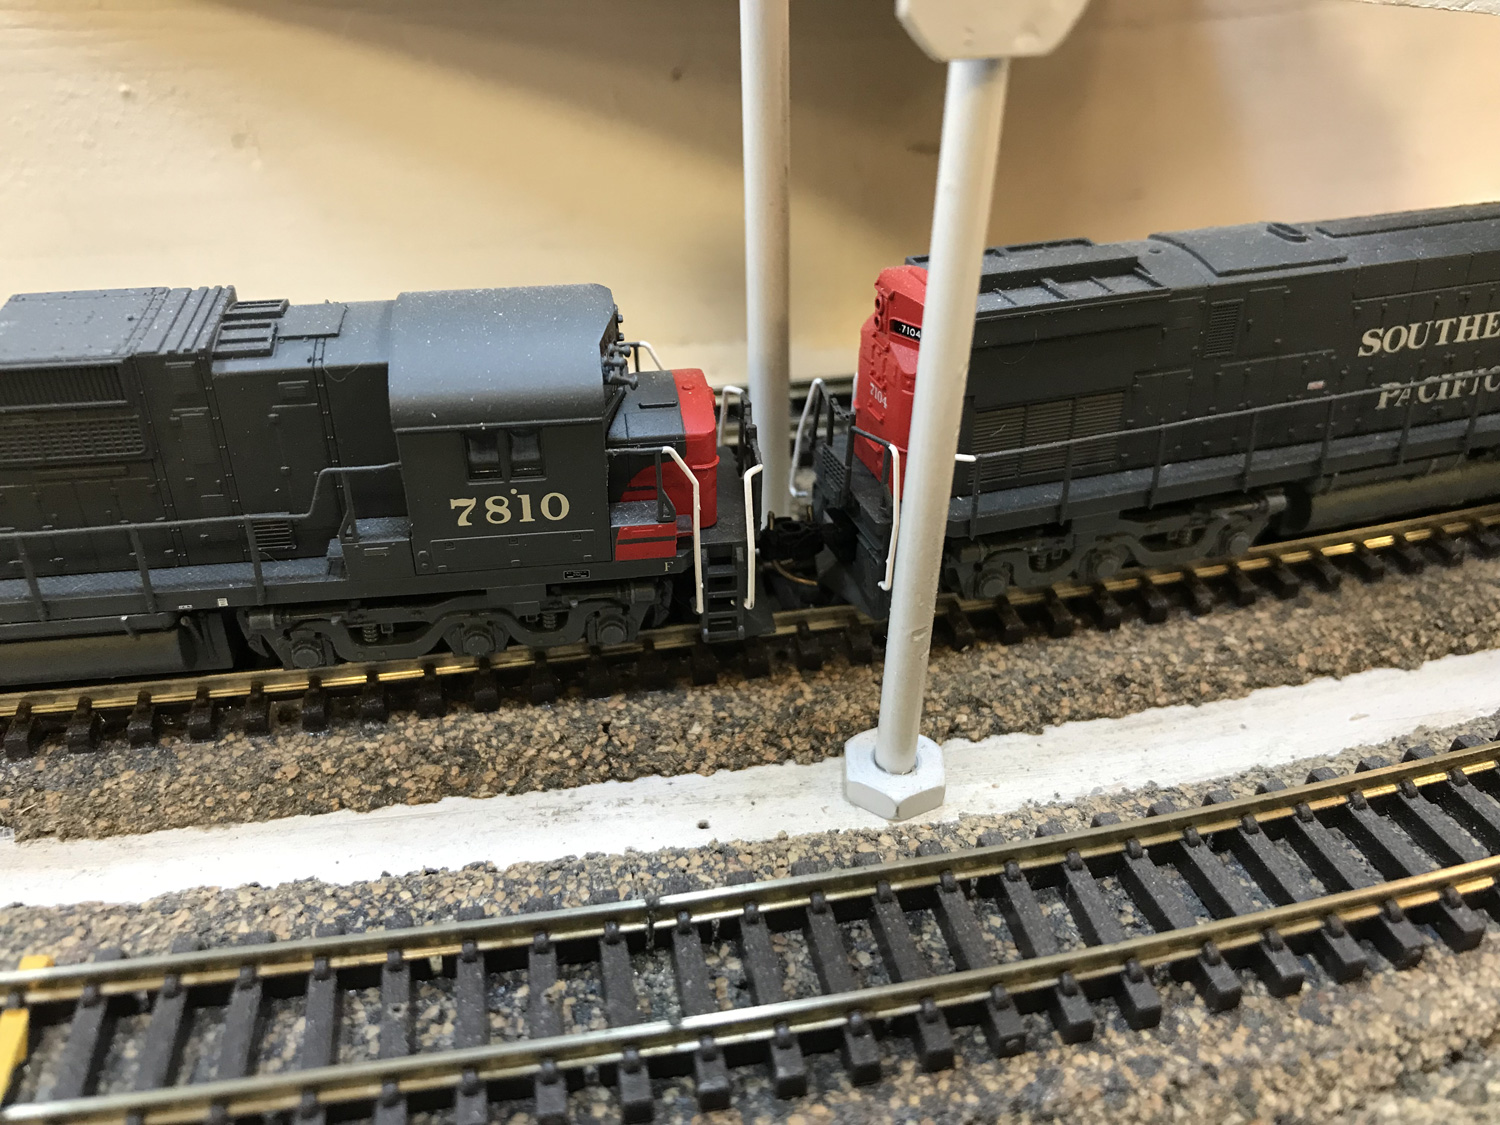
This has worked well but occasionally when after coasting to a stop the space between 2 locomotives lands right over the receiver that is under the track.  These particular Azatrax units close a relay contact momentarily but will continue to show detection as long as the beam is blocked.  When the beam is no longer blocked, the circuit is reset.  When it is time for the train to go out again, as soon as it moves the beam is blocked by the second locomotive and the circuit thinks the train has just arrived and switches to the next train in the sequence. 


After giving this problem some thought over a period of time I came up with some ideas on how to overcome this and recently I put those ideas to the test.  First I removed the IR transmitter stand and carefully bent both the 1/8 inch rod and the 1/8 inch tube near where they go through the deck.  This would hopefully prevent the beam from passing through between the locomotives.  After re-installing them I re-tested by slowly pushing a pair of flat cars over the IR receiver.  This helps as but did not totally correct the problem.  Next I pushed the IR receiver down deeper into it's hole between the ties.  This again was an improvement but did not totally prevent the beam from passing through to receiver.  Last, I made a lens from .250 wide by .010 Evergreen strip with a hole of about 1/16 inch.  The hole was aligned over the spot where the receiver is.  This seemed to do the trick.


To test the arrangement I was using a Kato SD40-2 and an SD40 set back to back and slowly pushed them across the path of the sensor.  These have the most open back porch and when running back to back provide the largest path for the IR signal to get through.


While these adjustments seem to have corrected this issue, the real test will come when the upper helix and return loop are finished.  Then I can setup several trains to run in continuous operation.

Sunday, November 13, 2022

Finishing the railroad rooming house

Last February I presented an assortment of structures that had been gathered for Carlin's main street.  It's time to see what has been happening with some of these.

We will start with the American Model Builders railroad rooming house kit.  Some time ago I had assembled the walls, base, and stairs.  This was necessary to be able to create the pit in the scenery that the building would go into.  Then I had finished the roof and added a few doors.  After that it sat in a box while I worked on other layout projects.   The photo below shows it how it was left.  Now I am going back and finishing this building, adding the rest of the doors, the windows and any finishing touches.


The kit models double hung wood windows.  The design of this kit allows for the lower, open-able section to be placed in any position so I have included some opened at various heights and others closed.  

Inside the building a center view block was added from .030 styrene and painted black.  Notches were made on the bottom to go around the two small magnets.


Some lighting was added to the outside of the building using a Miniatronics 1.5 volt lamp.  The wires were bent into the shape of a support arm and painted silver. 


Inside the building the tiny wires from the lamp are soldered to a Kato 77A board where I had removed the LED.  The board has a 270 ohm resistor on it.  Larger 22 gauge wires have been soldered to the input tabs of the board and those will be fed through a hole in the base of the building to connect to the 12 volt DC buss under the bench work.  Also in this photo the window glazing consisting of .010 clear plastic sheet can be seen.


This is the finished building planted into it's pit and held in place by the small magnets.  There is still more to do with some details around the area but the basic structure is now finished.


Friday, November 4, 2022

3D Printed Wheel Stops

Almost a year ago I learned about some 3D printed wheel stops from The Little Rock Line blog.  So I ordered them from an Etsy seller.  This was my first purchase on Etsy and have noticed that it seems to be a good source for N Scale 3D printed items and more reasonably priced than items on Shapeways.  I have since ordered a few more items on Etsy from this same seller and others.  Selection is not a large as Shapeways but hopefully will expand over time.

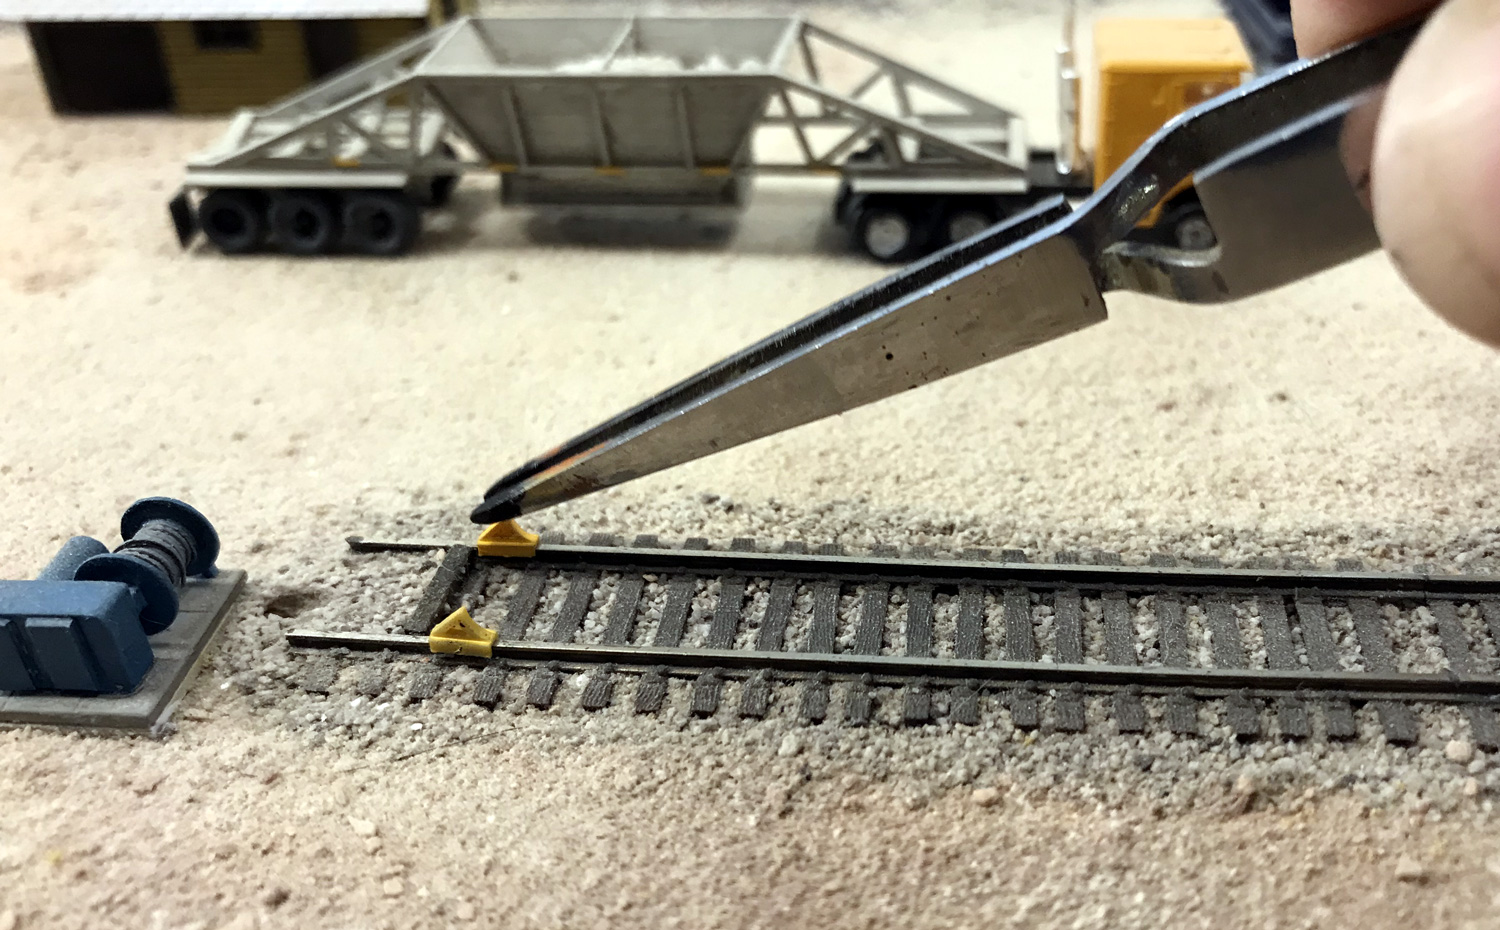
So just recently I got around to painting and installing these.  They come 12 in a pack consisting of 3 groups of 4.


Each wheel stop is mounted on 6 of the little posts that are common on 3D printed items.  I painted these with a brush before removing the wheel stop from the posts.  There is a little channel at the bottom where the wheel stops meet the posts so care was taken not to damage the channel.


After cutting the posts off with a spue cutter, I filed smooth any nubs left on the edges of the channel.  Installing these just took a small drop of super glue on the rail and then the channel fit right over the rail.


These wheel stops have been installed at the ends of 6 out of the 9 spur tracks on my layout.  The other 3 have some end of track bumpers that I scratch built from brass

Sunday, October 30, 2022

What's in Lovelock ?

From my study of the line I am modeling I know the local that went west from Carlin Yard was called the Lovelock local.  Lovelock is another small community along Interstate 80 between Winnemucca and Sparks.  Recently I got to thinking for the Local to be named that it must go all the way to Lovelock and there must be some sort of industries there.  So checking on Googlemaps I found out that just east of Lovelock there is one major rail served industry called EP Minerals.

EP Minerals appears to be processing center and truck to rail transfer site.  In the satellite view I can see as many as 14 covered hopper rail cars and at least one open hopper tractor trailer.  Some further internet research discovered the product processed there is something called Diatomaceous Earth.  This is used in many products and processes including filtration, paints, rubber, and dynamite.

The western end of this layout is at Winnemucca so Lovelock is well outside the modeled area.  However when I run my version of the Lovelock local I run it back to the staging yard.  So, I got to thinking why not simulate the industry there in the staging yard.  That would add to the interchange traffic between the local and the manifest freights in Carlin.

I have a number of Southern Pacific covered hoppers that could be appropriate for this industry.  Most of these are Delaware Valley cylindrical covered hoppers that I have had for almost 30 years. So I made car cards for all of these and made a car holder for the siding in the staging yard that will represent this industry.


For the waybills I decided to focus on the paint industry for now and found a few paint factories around the US.  Again on Googlemaps I was able to verify the presence of covered hopper rail cars at 3 different paint factories and made waybills with these industries being the customer.


Saturday, October 22, 2022

The Carlin foot bridge - part 2

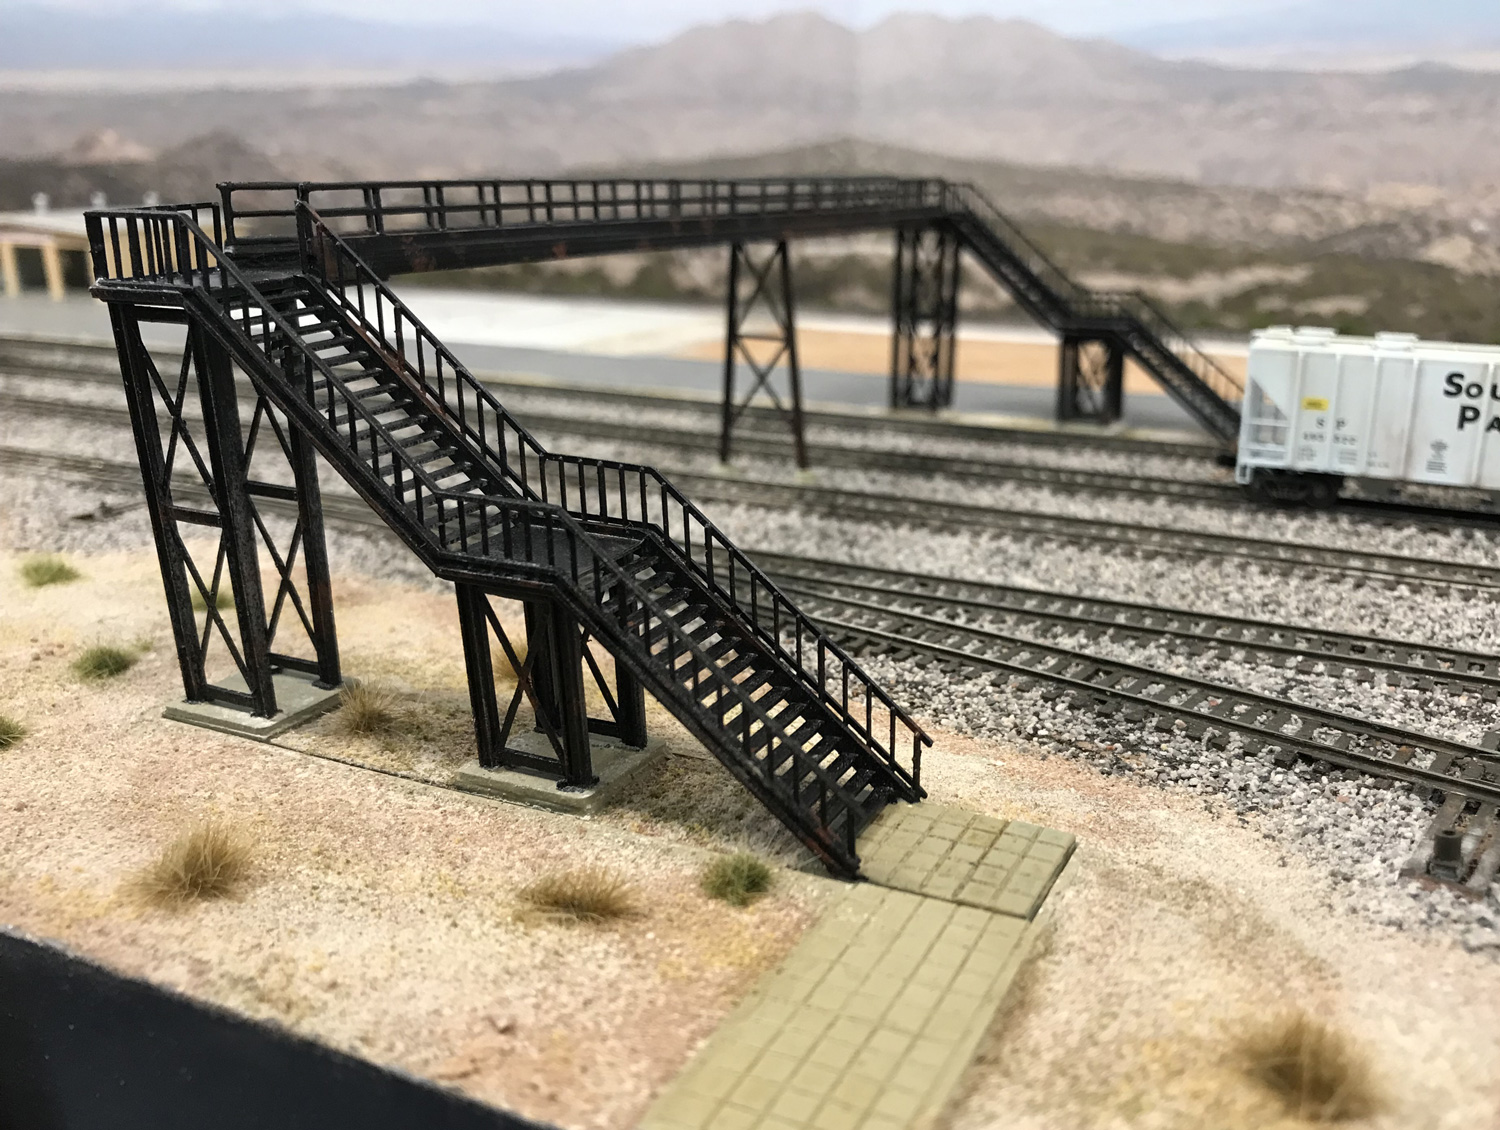
Way back in May I had started a model of the foot bridge over Carlin Yard.  The link to that post is HERE.  I finally got back to this project recently.  I ended up using Plastruct railings for the bridge and a left over support from the Walthers Glacier Gravel kit was used as mid span support.  The prototype has more than one so I will want to add another whenever can I find another similar support.


The entire bridge was airbrushed a flat black color and a little dry brush weathering was applied.  Side walks were added to the bottoms of each stairway.


The areas of the stairway bases that were not painted concrete color got some scenery applied to match the scenery in the surrounding area.