Showing posts with label kit. Show all posts

Saturday, April 4, 2026

A team track for Carlin

Something that has been sitting in my unassembled kit box for years is this laser cut loading ramp kit from Blair Line.  This was an easy kit to build.  The pieces are quite thin and all of the sections that make up the support structure are doubled for strength.  I used yellow wood glue applied with a tooth pick. 

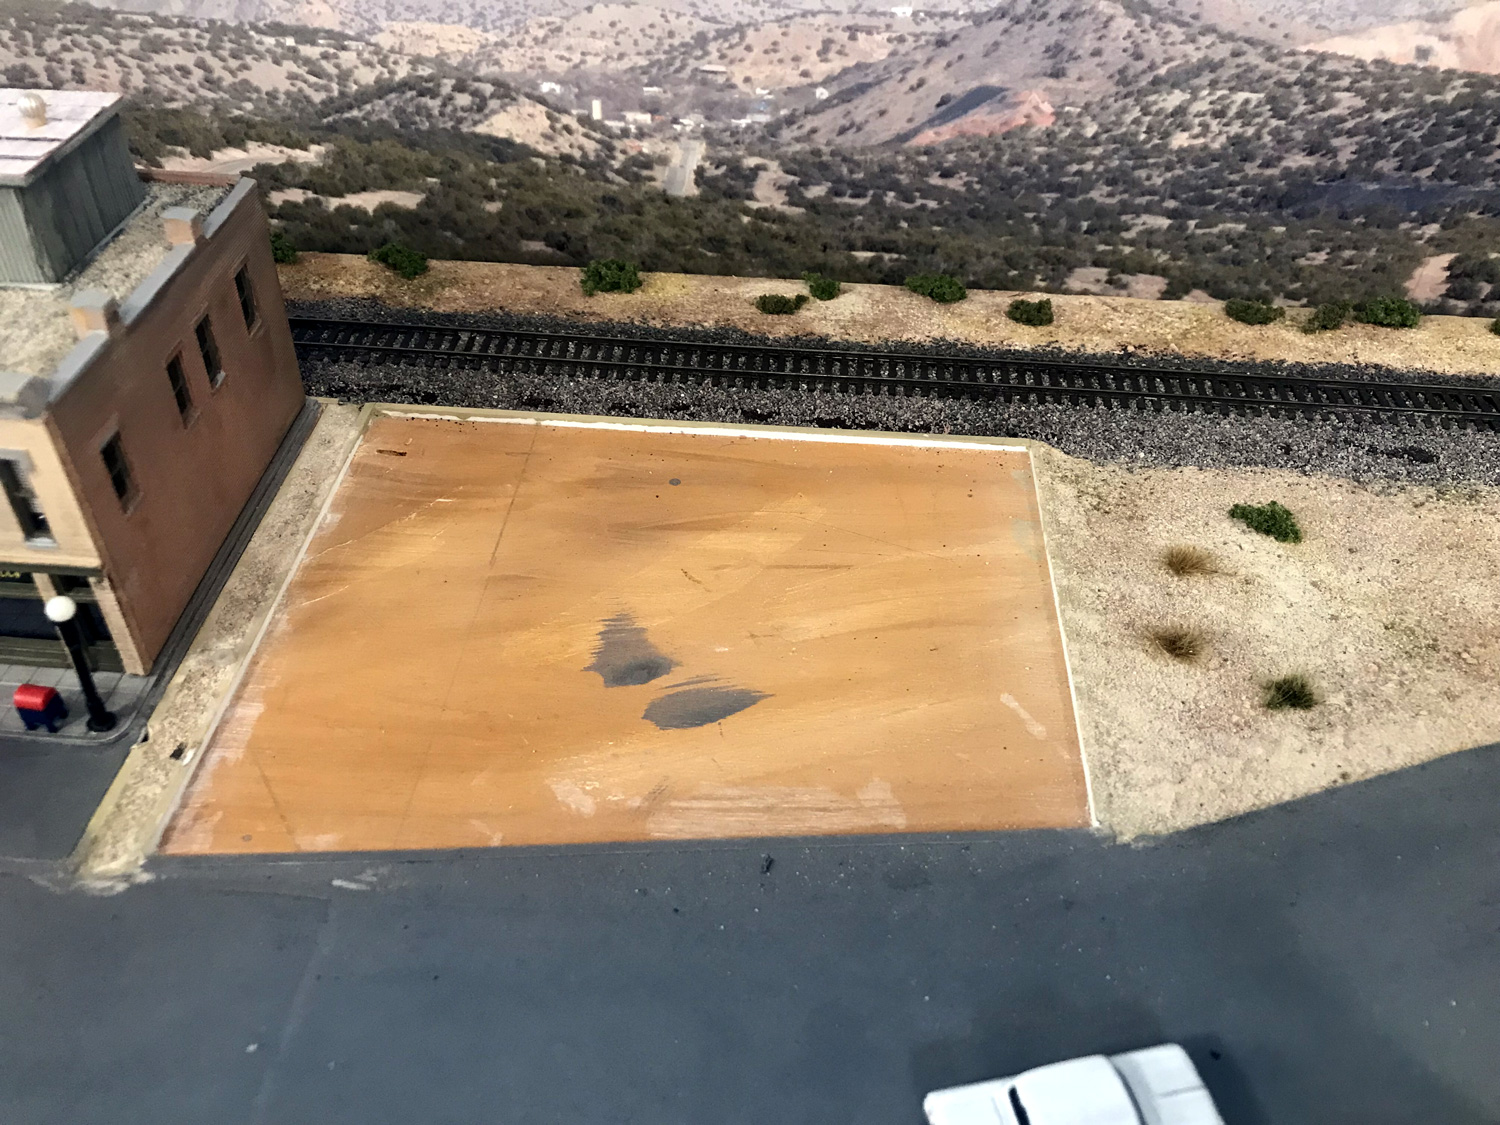
Once the kit was fully assembled and the glue dried, I set it in place next to the existing spur in Carlin that has been used for transferring chemicals from tank cars to trucks.  While I had originally thought I would use this ramp for the team track in Lovelock, it seemed to me to it fits in here better.


After staining with some diluted Vallejo burnt umber paint, the ramp was glued down next to the track with canopy glue with some paint bottles for weight on it until the glue dried.  Some weeds were planted around and under the ramp.  Later, I may build a concrete ramp for the team track in Lovelock.


Sunday, October 13, 2024

A gas station for Carlin - Part 4

It has taken over a month but this is the 4th and final installment on this project.  It has been an enjoyable project and I have taken my time with it. Being satisfied with the interior details, I installed the roof decking and the roll roofing material that came with the kit.   After the roofing material was installed, I painted it a dark green.


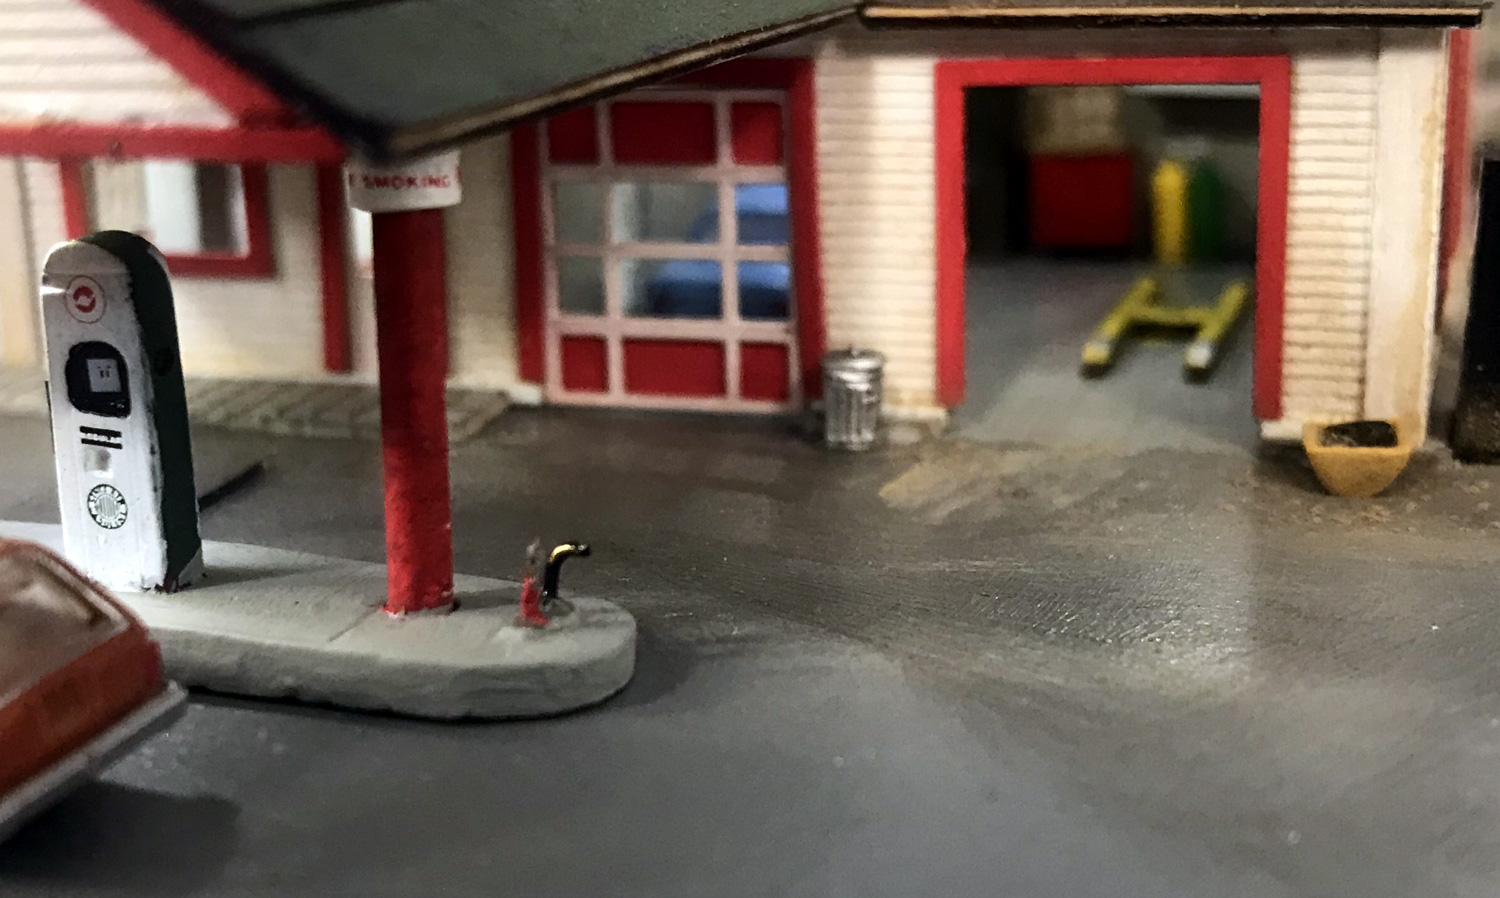
I did some more work on the pump island, adding water and air hoses made from .020 brass wire on each end. No smoking decals were added the posts, and more details with paint and decals were added to the pumps. 

One of the things I remembered about the gas station I worked at in high school was the tub of water they had to find the leak in a tire so I included something like that seen here as the yellow tub at the corner of the building next to the Coke machine.  I also added the hoses that would ring a bell whenever a car rolled over them.  Those were done with some small black wire.

The roof over the pumps was just large enough to mount the large Sinclair signs that came with the decal set.  The roof got some plumbing vents over the rest rooms and a TV antenna.  The exterior walls got a light weathering using brown detail wash and the roof got a light dusting with weathering powders. 


The sign on the pole is made from decals that came with the set.  The sign with the prices was made as a paper sign printed out from the computer and glued to a scrap of styrene.  The prices are about what I remember paying in the mid to late 70's before they just about doubled in 1979.


So with the completion of the gas station, all of the structures along Main Street have been finished.  There will always be little things that can be added and there are still things I want to do with the rail yard.


Friday, September 27, 2024

A gas station for Carlin - Part 2

Basic assembly of this kit has been quick and easy.  The pieces cut out easily from the sheets and the tabs and grooves fit perfectly.  I used my flat sheet metal fixture along with some magnets to hold the pieces nice and square while the glue dried.  This fixture is something I made 35 years ago and has been a great tool used for many structure projects.


One change I did make was to remove the large square columns from the island that support the overhang and replace them with styrene rods.  The large square holes that were on the bottom of the overhang section were covered with a styrene strip and holes matching the round columns were drilled in it.

Once the basic structure was assembled, it's exact position was determined on the base and a perimeter of .040 strip and sidewalk was glued to the base.  This will hold the structure in place but it will still be able to be lifted out.  As I was installing the sidewalks along the front and one side I realized that I will need to adjust the height of the outside doors to the bathrooms and office.

The building got painted a gray color on the inside and white on the outside.  The trims will be red and I am waiting for the red paint to arrive.  I am going to wait to install the roof sections as that will make it easier to add details on the inside.

Next I painted the surrounding area to match the nearby road.  In this photo the paint was still wet and when it dried, the color did match.  The floor inside the structure is another shade of gray and a coat of gloss finish to simulate the type of polished concrete floors found in gas station garages.


My local hobby shop did not have the decals I wanted for this project so I ordered them directly from Microscale.  I got a set for Sinclair and another set which is a general gas station set.  With decals in hand I started to make the signs that are separate items that will be added to the scene later.


Tuesday, September 10, 2024

A gas station for Carlin - Part 1

There was this one lot left on Main Street that I have planned to have either a gas station or grocery store.  I had considered doing a gas station with the garage being converted into a convivence store but then realized that is a more recent trend and might not fit in with my mid 70's to mid 90's era. 

I had this gas station kit left over from an estate.  It looks like a well designed laser cut wood kit that I have been looking forward to building.  But it seemed to me to be a different style of building than most gas stations I have seen so was not sure how it would fit in.


As I have done with the other buildings on this layout, this scene will be built on a removable base made from fiberglass reinforced plastic sheet.  It was verified that this building would fit on this base and leave enough room for the surrounding scene.


So, a gas station it would be.  But what brand, or should it be an independent?  After looking through some photos of gas stations on the internet, I found inspiration in this photo of a Sinclair station housed in a smaller, but similar style of building as my kit.  This photo will also serve as a guide for paint colors.


Microscale makes a nice decal set for Sinclair gas stations.  I'll be making a trip to the local hobby shop to look for it and if they don't have it, I will have to find it on line. 

Tuesday, August 6, 2024

Chipping away at the box of N Scale vehicle kits

Like many of us in N Scale, I have a collection of unfinished motor vehicle kits that have accumulated over the years.  I keep them in a box about the size of a large shoe box.  Most are cast resin but some are metal and there are also bags of finished plastic European vehicles that had been given to me.  Every once in awhile I dig through this box picking out a few to do something with.  


With the town of Carlin developing on the layout, I was looking to populate the town with some more vehicles that would fit in the layout's 1970's and 1980's era.  Here is the most recent batch of cast resin vehicle kits that I have finished.  A classic 50's era station wagon and a red 65 Ford Mustang.  These will be perfect for this layout.


The 63 Chevy fire engine is from a Lineside Models kit.  The yellow pickup, I think it's an early 70's GMC and is something I got on ebay.  The white 64 Chevy Impala is also from Lineside, my dad had one of these but his was blue.  The gray 2000 Chevy Silverado pickup was also from ebay.  Too modern for my layout's era but I had one like this for 17 years so had to have a model of it.


Saturday, July 20, 2024

A tale of two garages

 As I was building the diorama with the two 3D printed Sears houses, I wanted garages for them that would fit in with the style of the houses.  The same vendor that sells the houses also offers a 2 car garage but those would be too wide for the space available.

So looking around I found that the Blair Line single car garage kit would be a good fit for the space and  those also matched the style of the houses.  While searching for these I also found a M/T 100 ton hopper with a road number I did not have.


The garages started out as identical kits but I wanted them to look somewhat different.  Something built in the 1920s or 30s would have seen some changes by the 1970's.  Besides the colors, which match the colors of their respective houses, I did a few other small things.  On both of them I did not use the narrow corner boards which I found too fiddley to work with and did not fully cover the seams between the side walls.  Instead I used some narrow Evergreen styrene angle strip.   

The kit comes with two different options for the vehicle doors.  I chose the old fashions swinging doors for one garage and the tilt up / roll up door for the other.  This was painted aluminum color as many early doors such as there were bare metal.  On the garage with the metal main door .020 x .040 styrene strip was used for the trim to give a different look.

The kit comes with the option of having the window and people door on either side of the garage so I was able to assemble them with those features facing their respective houses.


I also used variations on position to make the two garages seem a little different.  Here are the two garages set temporarily on the diorama which itself is set temporarily on the layout.  The garage on the left is set all the way back on the lot while the garage on the right is set forward about 20 scale feet.  Currently working on the landscape and details on the diorama but the garages are done and will soon be glued into place.


Friday, May 17, 2024

The Overland Hotel

The building that hides the speaker for the Carlin yard switcher sound is now finished.  This was a Design Preservations Models - Hayes Hardware kit.  The building itself was not modified as it fit nicely into the space I had for it.  

The theme of this building is that of an older hotel which has seen it's better days pass when the interstate highway was built.  It has been refurbished and has had a large neon sign installed on the roof that can been seen from the interstate highway in the hope of attracting business.

I had recently purchased a 3D printed set of 180 roof top details and used 9 of those on the roof of this building.  The animated sign if from Miller Engineering with the support structure being scratch built from styrene.  


The electronics for the sign clip into a plastic cap from a prescription bottle which is glued under the roof of the building.  The power wires for this go down through a hole in the bench work and are connected to a voltage regulator from Miller Engineer specifically for these signs.  The wires for the speaker also go through the same hole.


Saturday, March 2, 2024

Finishing a 3D printed house

This 3D printed house is something I purchased a couple of years ago along with two others.  All three are based on the design of the Sears catalog houses of the early 1900's.  The one I am finishing here was the largest of the three and I intended to use it to house the speaker for the grade crossing in Carlin.  This particular house had a total of 5 pieces, there shown in the photo below after they had been sprayed with primer.  There was also a base and a small roof section not show here.


This is what it looked like after painting.  The small roof section is also present in this photo.  Painting these is similar to painting a Design Preservation Models (DPM) building.  I started by air brushing the base color then brush painting the trims and any details.  On this model I painted the chimney and the foundation walls a red brick color.  


There had already been a base prepared for this scene made from fiberglass reinforced plastic paneling.  Here is the completed house glued down to the base with a car port and other surrounding details being added.  The wire and plug sticking out on the right side of the base is for the grade crossing speaker. 

After installing the fences and more details at the work bench here is the completed scene installed on the layout into a recessed area that is surrounded by styrene strip with the scenery built up around the outer edges.  I still want to add a tree or two and that or other changes will be easy as this entire scene is removable. 


Tuesday, January 16, 2024

A crane for the scrap yard

 I wanted a small crane for the scrap yard in Carlin.  GHQ makes a pewter kit of a Bucyrus-Erie crane and I've been happy with how my other GHQ kits came out so I ordered one.


I was not sure if this was going to be realistic for the era of my layout but after seeing an on line advisement for a 1965 Bucyrus-Erie model 30B I knew it would be a good fit for the 1970s / 1980's.  The GHQ model is a 30B.  This photo also serves as a good reference for painting.


The most difficult part of this kit for me was the boom which is made from etched brass.  It was folded as directed in the instructions then any seams were soldered.  Some smoothing with a jewelers file was necessary afterward but I prefer that to trying to glue it.  Afterward the cast pewter top was glued into the square hole at the top of the boom.


I wanted to be able to rotate the crane cab in relation to the track assembly, so I cut the small guide pin off from the bottom of the cab and drilled and tapped a hole for an 0-80 screw.  Another hole was drilled through the small hole in the track assembly.   The stock kit did not leave enough clearance for the cab to rotate over the tracks and the cab seems to sit low compared to the prototype photo, so I glued a #6 washer in place as shown in the photo.


On to painting.  For the yellow of the cab I used some Floquil signal red then when it had dried I masked it off and sprayed the top half of the cab with Floquil ATSF yellow.  Both of these paint bottles are quite old but still worked great in my air brush, I sure miss Folquil paints. The track assembly, the boom, and the cab floor were sprayed with Model Master pale green.


The prototype photo I used in this post did not have the logo or model number but in other photos either one or both are evident, so I decided to add that to this model.  Decals were made which included both the Bucryus-Erie logo and the model number.  After the decals were set, the sub assemblies were sprayed with Dullcoat.  The cab and cab floor were super glued together and then attached to the track assembly with the screw. 


The boom was glued into place with super glue and some black thread was used to simulate the various cables.  I ran the thread over a wax candle before installing it.  This helps to keeping it from getting a fuzzy look and also makes it a bit easier to work with.  I made my own electromagnet boom from one of the hook parts that came with the kit, a styrene disk punched out with a hole punch, and a #6 washer for weight.  I plan to set the bucket part that came with the kit off to the side to indicate that the scrap yard also uses that on occasion.


Sunday, November 13, 2022

Finishing the railroad rooming house

Last February I presented an assortment of structures that had been gathered for Carlin's main street.  It's time to see what has been happening with some of these.

We will start with the American Model Builders railroad rooming house kit.  Some time ago I had assembled the walls, base, and stairs.  This was necessary to be able to create the pit in the scenery that the building would go into.  Then I had finished the roof and added a few doors.  After that it sat in a box while I worked on other layout projects.   The photo below shows it how it was left.  Now I am going back and finishing this building, adding the rest of the doors, the windows and any finishing touches.


The kit models double hung wood windows.  The design of this kit allows for the lower, open-able section to be placed in any position so I have included some opened at various heights and others closed.  

Inside the building a center view block was added from .030 styrene and painted black.  Notches were made on the bottom to go around the two small magnets.


Some lighting was added to the outside of the building using a Miniatronics 1.5 volt lamp.  The wires were bent into the shape of a support arm and painted silver. 


Inside the building the tiny wires from the lamp are soldered to a Kato 77A board where I had removed the LED.  The board has a 270 ohm resistor on it.  Larger 22 gauge wires have been soldered to the input tabs of the board and those will be fed through a hole in the base of the building to connect to the 12 volt DC buss under the bench work.  Also in this photo the window glazing consisting of .010 clear plastic sheet can be seen.


This is the finished building planted into it's pit and held in place by the small magnets.  There is still more to do with some details around the area but the basic structure is now finished.


Tuesday, February 15, 2022

Buildings for Carlin

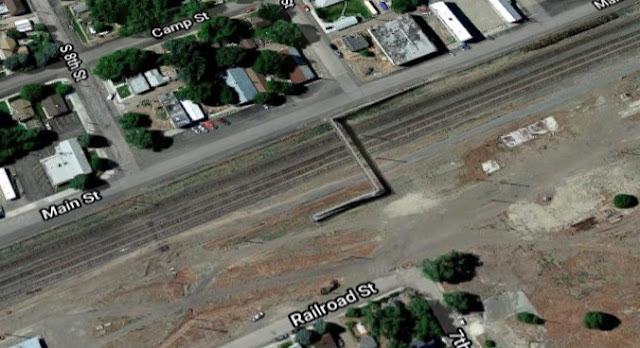
Carlin will be the most developed area on this layout.  Below is a screen shot from a Google maps 3D images that shows the area that my modeled scene will represent.  In the steam era the Southern Pacific Railroad facilities covered a large area in the center of town and that is all now gone and only 4 tracks remain.  In my modeled eras this was still a crew change point and a local originated from here.  One of the landmark features seen in this photo is the foot bridge across the tracks.

Of course as it is with most modeled scenes my representation won't be 100% accurate.  On my layout I will have the street shown as Main Street in the photo above running along parallel to the yard with buildings along the far side.  I have been going through my small stash of kits for structures that would fit in.  I have also purchased a few things and may later attempt to scratch build a couple of buildings.  The next photo shows some of the structures that will be used.

  • The Pola bridge I found at an open house last fall, it will be used with modification for the foot bridge.
  • The Laser-Art gas station is something I had and may use it.
  • The 3 stall fire station is from my last layout.
  • The blue building is from the Walthers Propane dealer kit.  Not using this part at the industry so am using it here as the yard office.
  • The half built wood structure is a railroad rooming house kit from American Model Builders.  I purchased this after reading that the SP had a "large wooden club house" in Carlin.
  • The tower is another AMB kit that I built about 25 years ago and had on an Ntrak module.


Wanting to have a few houses in the mix I found a seller on ebay that makes 3D models of the 1920's era Sears kit homes so I ordered 3 different models.   Each model is composed of several pieces so the detail painting can be done prior to assembly which should make it easier.


So I will have a few structures to work on which is fine with me as it is one of my favorite parts of the hobby.

Sunday, June 6, 2021

One more bridge

There are already 6 through truss bridges on the layout but I will be adding one more in the next expansion of the layout.  This one will represent the bridge that was on the Southern Pacific line on the east side of the Palisade tunnels which served the line for more than 100 years but was demolished by a derailment in 2008.


For this bridge I choose to use the brass kit from Micron Arts.  I have only done small brass kits up to the point and this by far will be the most complex one I tried.   I've had this kit stashed away for some time and honestly have been a little intimidated by it's complexity.


The most difficult part seemed to be the first step of the kit assembly.  I found that adding the webbing to the vertical uprights to be quite challenging.  After trying both soldering a gluing these and destroying some of the webbing parts I gave up and decided to leave the webbing out.  I cleaned up the solid parts of the vertical uprights and pressed on and then things went together more smoothly.


Taking my time in building this kit it still went surprising fast.  I was soldering most of the parts and did not have to wait for any glue to dry.  The finished assembly was quite strong and sat squarely on it bridge shoes.  In the photo below it is placed in about the location where it will eventually be installed.

Somewhere I read that brass models should be soaked / washed in vinegar before painting to slightly etch the surface so the paint will adhere better.  I let this soak for several hours and also used an old toothbrush to wash away any solder flux that might be left in the corners.  After the vinegar soak the model was rinsed and left to dry overnight.


Lately I have been trying out some paints from Mission Models and like them.  Using my airbrush I first applied two coats of their gray primer.  The coverage was fine but it took 2 coats to get all the different angles of all the parts.


After letting the primer dry overnight, I gave the model 2 coats of what Mission Models calls tire black which is a flat black.


Now being finished except for some weathering, this will be put away until construction starts on the next expansion.  I don't expect that to happen until winter at the soonest.  The kit came with a section of code 55 bridge track the same length as the bridge.  I won't use this as I like to use a longer section and replace the bridge ties on both ends with standard ties so the joints are well clear of the bridge ends.