Saturday, January 27, 2024

Building the propane dealer - Part 2

As this is a bigger project, I am presenting it more than one post.  This is part 2 of what will be 3 parts.

The larger building from the Walthers Cornerstone Central Gas & Supply kit had already been used as the Southern Pacific Operations office in Carlin.  The two smaller buildings and the pair of storage tanks from the kit were assembled so it could be determined how they would fit in the area that I plan to place the industry.  Once that was determined, a base was cut out from a sheet of .040 styrene.


Using the base as a guide, a border of .040 x .060 styrene strip was glued to the layout deck so that the .040 height will match the height of the base.

The base with most of the more delicate piping components was then assembled at the work bench.  When finished, it can then be installed on the layout as a major sub-assembly.  As my layout of the components was quite different than the stock kit, much of the piping was cut apart and re-assembled to fit.  I also used some of the Plastruct plastic coated wire in some areas.  Once the layout of the tanks and small structures was confirmed, styrene strip borders were added to lock in the locations.  Then a layer of N scale ballast for gravel was applied.  When the gravel base had dried, the tanks, small buildings, and pipes were installed.

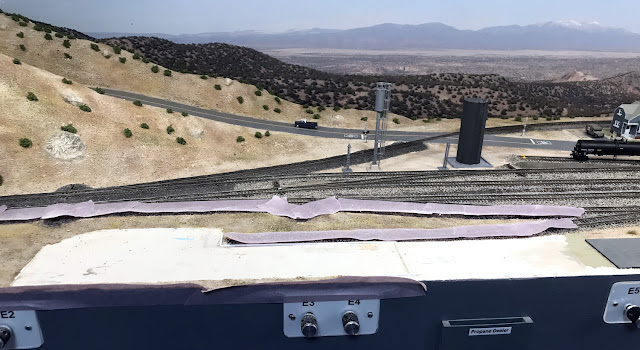
The scenery was built up around the outside of the .040 x .060 styrene strip borders.  This view shows where the base will go.  There will also be another .040 styrene base to the right of it that will also be part of this industry but will be built in place as it will not have any delicate piping to deal with.


Gold Medal Models chain link fence was installed around the perimeter of the facility.   Holes were drilled along the styrene border strips using the hole guide that is part of the fence kit.  Canopy glue was used to secure the fence in the holes.  The part along the front edge will be left open suggesting that the facility extends further out. 


The tank car unloading and delivery truck loading area was scratch built using various bits of things I had laying around the work bench.  On the fence near the spur track, I painted an .010 by .020 styrene strip silver and glued it about 3 feet from one of the fence posts suggesting a gate.  As the spur track is outside the perimeter of the facility, workers would need a way to access a tank car and this gate would do that.  


End of Part 2.

Tuesday, January 16, 2024

A crane for the scrap yard

 I wanted a small crane for the scrap yard in Carlin.  GHQ makes a pewter kit of a Bucyrus-Erie crane and I've been happy with how my other GHQ kits came out so I ordered one.


I was not sure if this was going to be realistic for the era of my layout but after seeing an on line advisement for a 1965 Bucyrus-Erie model 30B I knew it would be a good fit for the 1970s / 1980's.  The GHQ model is a 30B.  This photo also serves as a good reference for painting.


The most difficult part of this kit for me was the boom which is made from etched brass.  It was folded as directed in the instructions then any seams were soldered.  Some smoothing with a jewelers file was necessary afterward but I prefer that to trying to glue it.  Afterward the cast pewter top was glued into the square hole at the top of the boom.


I wanted to be able to rotate the crane cab in relation to the track assembly, so I cut the small guide pin off from the bottom of the cab and drilled and tapped a hole for an 0-80 screw.  Another hole was drilled through the small hole in the track assembly.   The stock kit did not leave enough clearance for the cab to rotate over the tracks and the cab seems to sit low compared to the prototype photo, so I glued a #6 washer in place as shown in the photo.


On to painting.  For the yellow of the cab I used some Floquil signal red then when it had dried I masked it off and sprayed the top half of the cab with Floquil ATSF yellow.  Both of these paint bottles are quite old but still worked great in my air brush, I sure miss Folquil paints. The track assembly, the boom, and the cab floor were sprayed with Model Master pale green.


The prototype photo I used in this post did not have the logo or model number but in other photos either one or both are evident, so I decided to add that to this model.  Decals were made which included both the Bucryus-Erie logo and the model number.  After the decals were set, the sub assemblies were sprayed with Dullcoat.  The cab and cab floor were super glued together and then attached to the track assembly with the screw. 


The boom was glued into place with super glue and some black thread was used to simulate the various cables.  I ran the thread over a wax candle before installing it.  This helps to keeping it from getting a fuzzy look and also makes it a bit easier to work with.  I made my own electromagnet boom from one of the hook parts that came with the kit, a styrene disk punched out with a hole punch, and a #6 washer for weight.  I plan to set the bucket part that came with the kit off to the side to indicate that the scrap yard also uses that on occasion.


Wednesday, January 10, 2024

Building the propane dealer - Part 1

In the actual Carlin, Nevada there is a rather large rail served propane dealer.  As shown in this Google maps satellite view it has 10 storage tanks, 2 spur tracks, and covers an area of about 650 feet x 200 feet.  This facility is about 1/2 mile east of town.


Here is a Google street view image of the facility from Chestnut Street.  Some of the details spotted in this view are the chain link fence with barbed wire on the top, the large tandem trailer delivery truck, and the trailer used as an office.  The storage tanks are just visible in the far left.

This is the area I have on the layout for my representation of this propane dealer.  This is on the extreme east end of the layout and has an overall area of about 290 x 55 scale feet including the spur track.  I don't want to overcrowd the scene so I will need to do quite a bit of compression.


Surprisingly there are not many options available for this type of industry in N Scale.  Plastruct offers a kit with the tank shapes and materials to build a customized facility and there is the Walthers Cornerstone Central Gas and Supply kit which is what I am going to use.  To be continued....


Monday, January 1, 2024

Layout visit - SP San Ramon Branch

It's fun to get out and see other layouts.  Recently a friend from the Ntrak club and I visited an N Scale modular setup at a museum about 40 miles away in Danville, California.

This layout has been set up in the Museum of the San Ramon Valley for the past several weeks by a group of N Scale modelers including Paul (in the red shirt), who is my partner in the AsiaNrail modular layout and is also active in our Ntrak group. 

The layout represents the Southern Pacific San Ramon Valley Branch as it would have been in the 1920's.  This was a point to point setup running steam engines and using an NCE DCC system for control.


Several of the modules were Paul's and are ones we have used in the AsiaNrail layout.  One of these is this Wye module shown below.  While the track is attached, all the scenery elements are removable so this module can be used in different type layouts.


This is the same module in the AsiaNrail layout.


Here are a couple of the many well done scenes on this layout.


The museum itself is in a restored SP standard number 18 station similar to several that are modeled on this layout.


Station signs and track diagrams were used around the layout to give a better sense of where you were on the line.  


We had a great time visiting this layout and afterwards enjoyed lunch at one of the nearby eating establishments.  I've driven through this area on the Interstate countless times but never realized before that there had at one time been a rail line following the same route.

The San Ramon Valley Branch group has a website:  https://thesrvrr.yolasite.com/

Also, TSG Mulitmedia did a fine video on this layout: 

 Southern Pacific San Ramon Valley Branch N Scale Layout Tour (youtube.com)