Monday, July 3, 2023

The 2023 N Scale convention - Part 3

 N Scale layouts at this convention included 3 Ntrak, a really large FreemoN, a T-Track, a Disneyland display, and a static vintage Lone Star layout.   As this was the first time I have ever seen a T-Trak layout of any size and the first really large FreemoN layout, I'm going to feature those here.

FreemoN:  I spent quite some time wandering around this layout late one evening enjoying the realistic scenery.  A few of the modules I recognized as being from the local group in the Bay Area but most of them came from other areas and were new to me.


The scene is from a module set that I recognized as being from the local group in the Bay Area.


I did not see all that many trains running on this layout but that could have been because it was after hours.  


Lots of the modules in this layout had some really well-done desert scenery.


This particular module of Afton Canyon I am sure I've seen in a magazine somewhere.  These are the same BLMA bridges as the one I have on my layout in the Palisade Canyon.


In the next post I'll show part of the T-Trak layout.

Monday, June 26, 2023

The 2023 N Scale convention - Part 2

This is the second installment in my posts about attending the recent N Scale convention in Reno, Nevada.  

Peninsula Ntrak was assigned a 26 ft x 38 ft space for our layout and we ended up using 26 ft x 32 ft.   7 Members of our group brought their modules to the convention plus we used our large club staging yard and 5 of the club's outside corners modules.  We also had several of our members there without modules and they provided extra help with setup, running, and tear down of the layout.


A couple months before the convention, one of our members who is really good with scenery took one of our 30 plus years old corner modules with it's original scenery home for a re-do.  Just before the convention she brought it over to my train room where we completed a few finishing touches.   A total of 6 different members contributed to this project.  Shown here are Julia Jackson and Paul Ingraham.

We displayed this refinished corner module for the first time in our layout at this convention. This photo provided by Mark St Clair.

The layout was setup and running by Thursday afternoon and ran through Saturday afternoon.  Peninsula Ntrak has the flexibility to run DC or DCC on any of the 3 basic Ntrak lines.  We ran this layout using DCC on the red and blue line and DC throttles on the yellow line.  I ran DCC with one train on Friday and another on Saturday.  This was my Saturday train passing through the staging yard on the red line.  It was one of many different trains run by club members and guest operators.  Photo by Mark St Clair.


On Saturday the show was open to the public from 9:00am to 3:30pm and drew a good crowd.   It was a bit of a rush to get everything taken down and packed up by 6:30pm for the convention banquet but we did it.


Next post I'll show something of some of the other layouts that were set up at the convention.


Tuesday, June 20, 2023

The 2023 N Scale convention - Part 1

Between June 15th and 18th I was able to attend the 2023 N Scale Enthusiast convention in Sparks, Nevada.  This was at the Nugget which is between Union Pacific's Sparks yard and Interstate 80.  In fact the casino extends under the highway. 

My wife and I had a room on the 28th floor with a great view of the yard.  Many attending the convention had a similar view.  It's a really interesting yard with a small intermodal operation going on nearest to the hotel and a number of rail served industries on the other side.  All of the through trains stopped here for crew changes and some manifests had cars to set out or pick up so there was always some action going on.   On my layout I call the western SP staging yard Sparks as it is the next western terminal beyond the west end of the layout.


The NSE conventions offer quite a few things and sometimes one has to pick and choose to fit as much in as possible.  Besides brings modules for a layout, I also had something in the contest room, a couple of items in the live auction, helped present a clinic, and went to the welcome reception on Wednesday, the Ice Cream Social on Friday, the Banquet on Saturday, and the Manufacturers Breakfast on Sunday.  Did not do any of the tours this time.

When attending a convention it's always fun to catch up with people who you've met at other events and for me at this convention there were many.   Doug Gary was just one such example.  He brought his set of Disneyland Ntrak modules from New Mexico as a stand alone layout.  I first met Doug 23 years ago when I was coordinating the Ntrak layout for the 2000 National Train show in San Jose.  Over the years he has returned to shows in San Jose several times as a vendor with his custom painting business.   It was great to see him and his work again.


Another event I attended on the first evening at this convention was an online modelers meet up hosted by George Johnsen.  I was able to meet several people who I have known or followed on various online venues.  One of them was Bob who I have known from his YouTube channel "DaBob's N Scale Man Cave."   Here's Bob as we were checking out the FreemoN layout.


As mentioned above I brought modules to the convention.  In fact, I towed the Peninsula Ntrak club trailer to the event.  It was the first time we've been able to put up a layout since before the pandemic.  Of course we were a bit out of practice with layout setup but everyone pulled together and we had a great layout.  There will be more about ours's and some of the other layouts in an upcoming post.


This shot was taken at the I-80 west bound rest area near Donner Summit on the way home.  This is at 7,200 foot elevation and it's the first time in many years that I've seen any snow on the ground in June.  We had a wet winter and has been a cool spring and summer so far.


To be continued ....

Sunday, June 11, 2023

Scrap metal piles

The scrap yard industry I am building on my layout will need some piles of scrap metal as the source for loading rail cars.  The process I used to create a large pile of chopped up scrap steel is similar to how the gondola loads were made.   Because of how large this pile would be I started with a piece of 3/4 inch plywood cut to the desired shape and then shaped further with a belt sander to get what is shown in the photo below.


This wood block was then painted a flat black color which made it look a bit like a pile of coal.


The wood base does not work well with the liquid PlasticWeld so an initial layer of plastic pieces were attached to the wood block with Super Glue.  Additional layers were then added using the Plasticweld.


Once the layers of plastic scrap were finished, the entire pile was brushed with a watered down rail brown paint so it would soak down into the spaces.  If anything is left uncovered the black base of the wood block should make it not so noticeable.   Next the entire pile was given a light spray of rust colored paint.  Once that dried individual pieces of scrap were dry brushed in various dull colors, and the pile was given a coat of Dullcoat.  On this one I also added some weathering powers.


Here is another smaller scrap pile I made using clear plastic from a water bottle.  This was the one I had some trouble with the glue and paint sticking.


Monday, June 5, 2023

Scrap metal loads for the gondolas

One of the products my scrap industry ships by rail is carloads of metal scrap separated by type and grade.  Not having exactly what I wanted in my stash of cast resin loads, I decided to make my own. This load will be for steel scrap that has been chopped up.  I needed some thin plastic and is was suggested that I try plastic bottles as a source.  I tried that first and it looked good but I had trouble with both adhesives and paint sticking to it.  What I have had nice results with is the type of plastic from a food tray like the one shown below.


The load was built on a scrap of clear acrylic plastic cut to fit inside the gondolas.  I drilled a hole in the middle and glued in a cut off roofing nail so the load could be picked up with a magnet.  Gluing a thin piece of steel to the acrylic base would also.


The top surface of the acyrilic was painted flat black.  The black plastic tray material shown in the first photo was cut up into small pieces which were about 2 to 3 scale feet square. This material works well with Plastruct Plastic Weld.  In the photo the process is just started and can be built up to whatever depth is required.  Looking carefully in this photo part of the round head of the roofing nail can be seen.


After building up the scrap to the desired depth, I brushed on a heavy coat of rail brown that was somewhat diluted so it would run down into the small spaces.  After that dried I airbrushed a light coat of rust and after that dried, I dry brushed some lighter colors on some of the individual pieces.   The photo below shows the finished result.


As was envisioned, the load can be easily removed using a magnet without having to remove the car from the track.  In this photo it can be seen that much of the overall thickness of the load is made up from the thickness of the acyrilic base.  This load is about 3 scale feet thick.


Thursday, June 1, 2023

Creating a pair of RailGon gondolas - Part 2

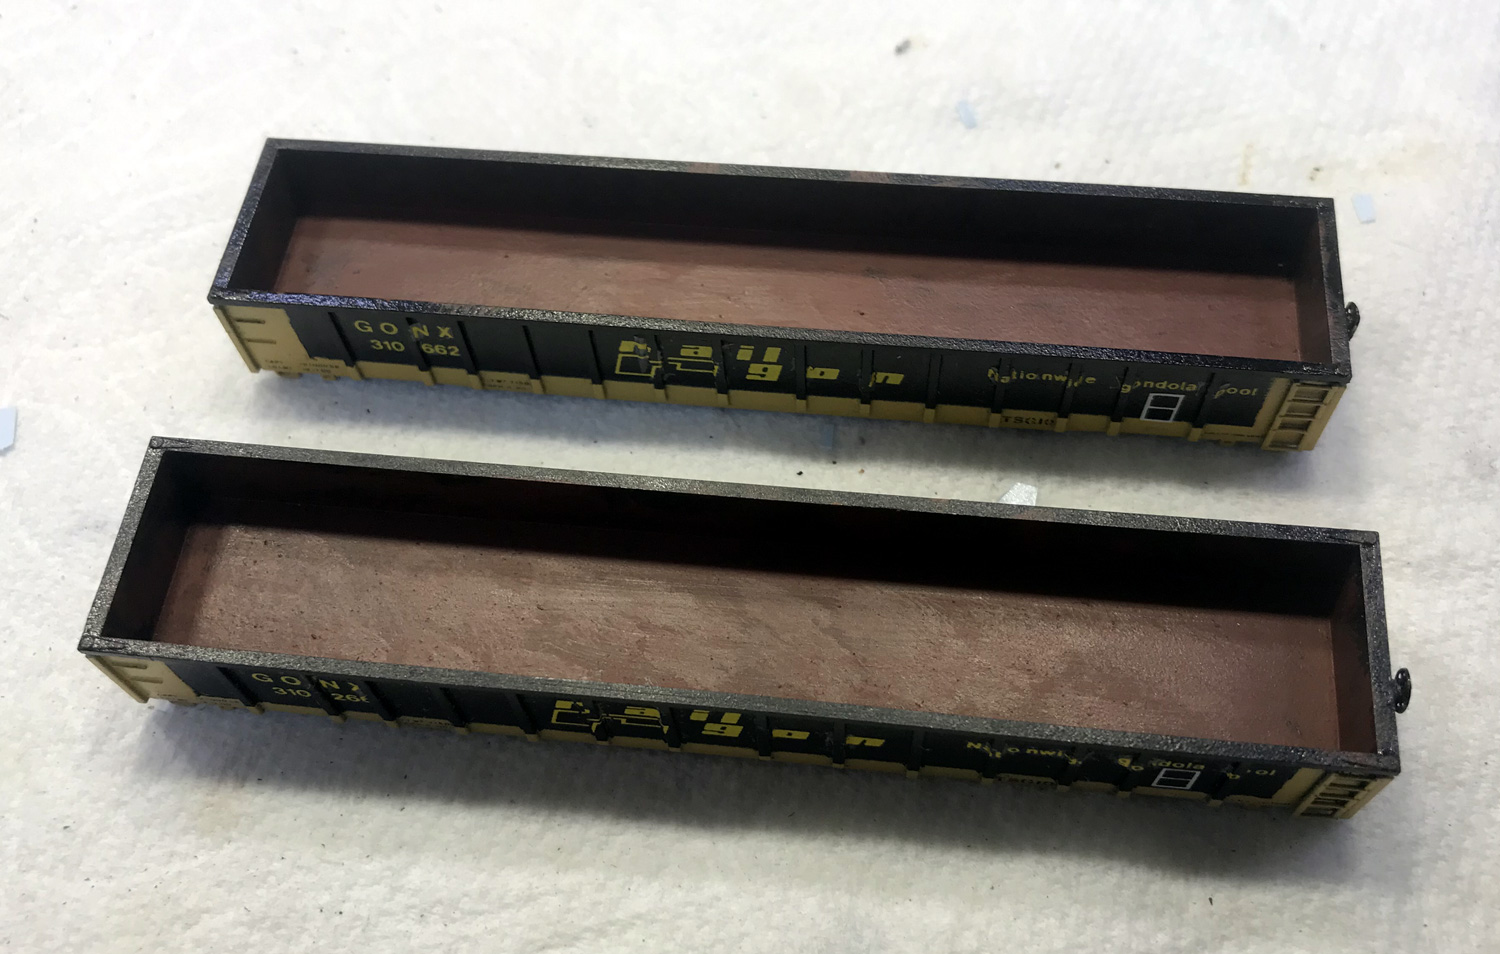
It took quite a bit of time to do the decals but then it's something I enjoy doing.  The larger decals had to be carefully manipulated around the pillars.  The decal set came with decals for 2 RailBox box cars but only one set for the RailGon so I used two decal sets.  The stock road number is 310266.  I moved the numbers around on the second set to make the second car's road number 301662.


The floors of the gondolas were brushed with rail brown and then dabbed with a small sponge brush to give it the texture seen here.  The inside walls were given the same treatment only lighter with some of the black showing through.


After a spray of Dullcoat, 310662 got some light weathering and 301266 got a little heavier weathering.


I had some nice low profile metal wheels that fit the Atlas trucks so kept those trucks and their couplers and sprayed the side frames of the trucks with rail brown and installed those metal wheels.  These roll really well and these two gondolas are now ready for service.  These 52 foot cars are just a bit longer then the cast resin loads I have for the Micro-Trains 50 ft gondolas .  So the next project will be to make some scrap metal loads for these. 

Monday, May 29, 2023

Creating a pair of Railgon gondolas - Part 1

As I have gone deeper into the operations of the layout, I have been trying to gather the correct cars for each of the industries.  One of the considerations is a railroad's preference to deliver one of their own empty cars to an industry for loading.  When looking through the 14 Micro-Trains gondolas in my collection, I found that I had only one Southern Pacific.  I then did purchase a recent release of a Cotton Belt model.  Golden West was a subsidiary of the SP and I was also able to purchase a Micro-Trains Golden West gondola on ebay.

And then I started looking at some lease / private owner gondolas.  I really liked the RailGon gondolas, and Micro-Trains has done a few of those but I have not been able to find any.  Athearn and Con-Cor have also done them but looking at the photos I was not happy with the quality of the paint work, specifically the blurry lines between the black and yellow along the bottom.


At a recent club open house I picked up a pair of Atlas models of the Thrall 2743 gondolas for $7.00 each.  These are not quite the exact model as the prototype photo.  The prototype has 14 panels and the model has 15.  However the models are the correct length and the pillars between the panels appear to be a good match so I decided to try to create may own RailGons.


This particular decal set is no longer offered by Microscale but I was able to find two sets on ebay.


The trucks were removed from the plastic body and metal chassis.  The chassis and body seemed securely attached and I did not attempt to separate them.   I soaked the body / chassis a paint stripper from the hobby shop, then washed in warm water scrubbing with an old tooth brush. 


When the paint removal was done I was surprised to find that one of the models was molded in black plastic and the other in gray plastic.


To have something for a clip to hold on to, I attached a scrap of plastic to the deck of the gondola with E6000 adhesive.  This can be pulled off later without damaging the model.  The gondola was then air brushed with Model Master gloss black.  After letting that dry overnight I masked that areas that would remain black and sprayed with Trailer Train yellow.  I had at first attempted to wrap the tape around each pillar to get a clean line but had trouble keeping the line straight so the tape was just applied to the surface of the pillars in a straight line. 


After just a bit of touch up with a small brush, this is what I ended up with.  I am satisfied with the result of the separation between the black and the yellow along the bottom which is what I had noticed was blurry on the Athearn and Concor models.


This is the end of part 1, I'll continue this project with decals and finishing in part 2.

Wednesday, May 24, 2023

Securing Micro-Trains HUMVEEs to flat cars

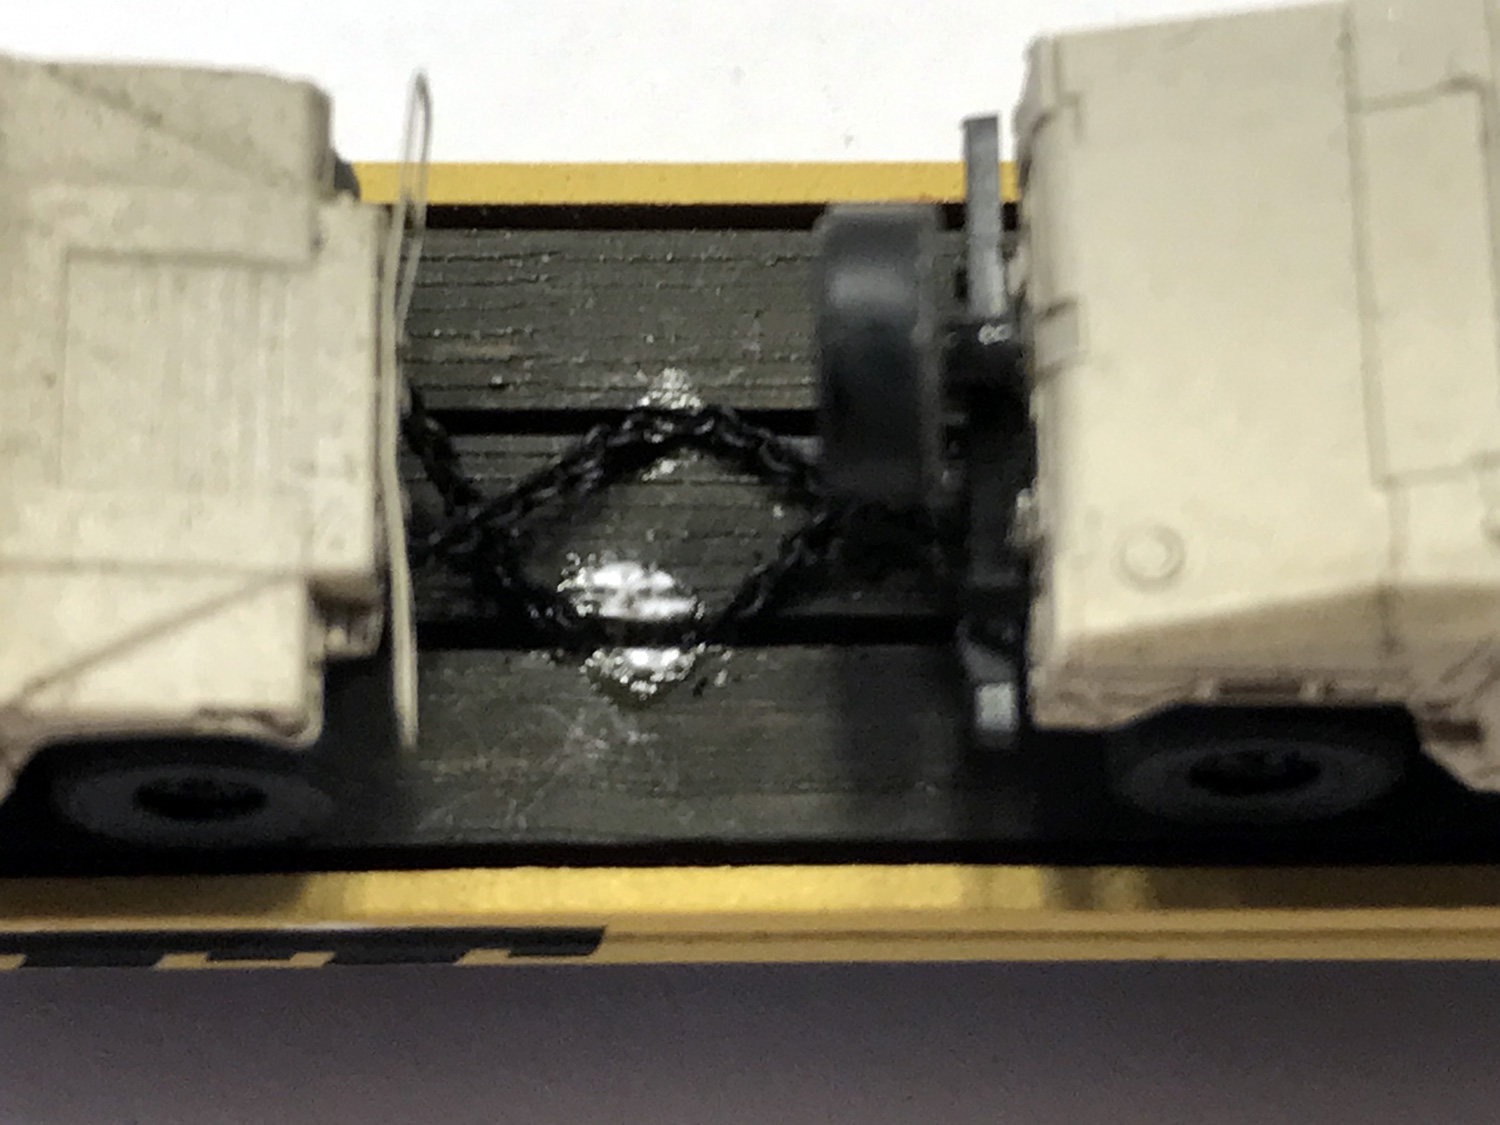
 In a post from a couple of years ago, I showed how I had modified a pair of undecorated Micro-Trains 89 ft flat cars to an F226 configuration with wood decks and hold down tracks in the decks.  A link to that post is HERE.  30 gauge magnet wire was used to create a way to connect the end of the chain to the vehicles.  It was looped through the end link of the chain and twisted.

A .022 drill bit in a pin vise was used to make a hole in the chassis section just inboard of the tires. 


This next view is looking from the top of the chassis section.  The twisted end of the magnet wire was inserted through each hole from the bottom with its length of chain.  The ends of the magnet wire sticking through the top the chassis were bent over and a drop of super glue was placed on each of these. 


After the super glue had set, the copper magnet wire loop that sticks out of the bottom of the chassis with the chain attached was painted with gloss black paint to blend in with the chassis.


A small amount of E6000 adhesive on the inside edge of each wheel was used to secure the vehicles to the flat car deck.   After the adhesive had set, the loose ends of the chains were inserted into the hold down tracks modeled as slots in the wood decking.   A drop of super glue was placed on the ends of the chains to secure it to the deck.  After the super glue had set, the deck was touched up with roof brown paint to get rid of the shiny spots of glue.

I mounted 4 Micro-Trains HUMVEE models on one of my F226 flat cars this way.  3 of these are modified models and 1 is stock.  In the near future I plan to load up the other F226 flat car this way.


Tuesday, May 9, 2023

Another new layout video - May 2023

Continuing to prepare for next month's N Scale convention in Reno, I am selecting and testing the trains I am going to bring to run on the Ntrak layout.   One of the trains I am taking is a 35-car ice reefer train pulled by my ABBA set of Micro-Train FT's.   This is outside the normal era of the Palisade Canyon home layout so this is the first time I have run it here.  I shot some videos of it passing through different parts of the layout and uploaded the video to YouTube, Enjoy!

Link to the video on YouTube