Back in June I posted about the lift bridge I had constructed across the entry into the train room, that post can be seen HERE. After six months and changing seasons it has remained quite stable. With this current layout expansion the bridge will be needed so now to put some track on it. The idea of my bridge is to use tunnel portals and hillsides to hide the bridge being in the scene.
The actual Palisade tunnels that this part of the layout represents on are on a straight alignment but I am going to take some liberties with the track alignments through these tunnels to make my track plan work. The tunnel portals on the right or west side are angled to allow for a larger radius curve around the corner.
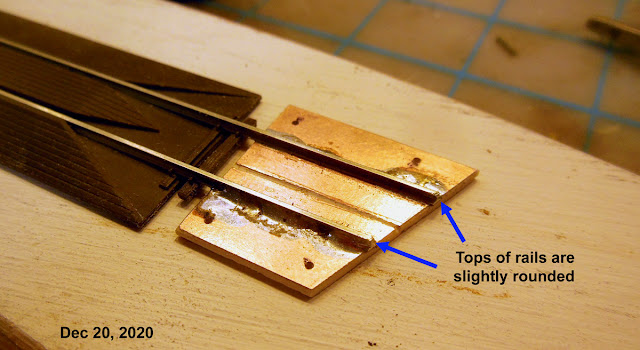
At the points where the tracks meet at the gaps I am using copper clad PC board as these will hold the track very stable. I was able to buy the material on ebay in a 2" x 6" size and then cut it into 1" x 2" sizes. These were then cut at the angle that the track will cross the gap. Each of the 4 track / gap angles are different. Holes were drilled on both sides for track nails and a groove was cut through the copper cladding to isolate the rails.
On the lift bridge we built many years ago at the Ntrak club, we used Atlas code 80 re-railer tracks at the gaps. The idea was that if a set of wheels gets derailed at the joint it will get re-railed right away. This has worked out well so I wanted to try the same idea on my layout's lift bridge. A friend had recently given me some Atlas code 55 re-railer tracks and the rails were a perfect match for the Mico Engineering track I am using. Traffic will move mostly in one direction on each track so the re-railers are placed the side after the train crosses the gap. Another lesson learned from the Ntrak bridge experience was to round the tops of the rail end a bit. This helps with smooth running but also with a shirtsleeve being snaged when someone goes through and pulling up the track.
The gaps were done in pairs on the work bench with the second one being done with a tracksetta tool in place to hold the alignment and the track gauge was carefully checked with both an NMRA track gauge and a caliper.
So at this point the track is in place and everything seems to roll smoothly over the joints with no derailments. After the holidays I will post about the electrical aspects of the bridge.


No comments:
Post a Comment