Monday, August 29, 2022
Home made mini track level tool
One day the frame fell apart and I could see that the individual bubbles could be removed. The 45 degree bubble served no purpose in my application so I removed it to make a special tool.
Attaching a small strip of styrene to this with adhesive keeps it from rolling. Now this can be placed across the rails anywhere along the line to check for level even in those places where the spaces is tight.
Monday, August 22, 2022
Turnout controls for Carlin
At Battle Mountain I used manual push-pull controls for all of the turnouts, with each having a small panel with a simple track diagram and and bi-color LED showing the status. The photo below shows what these look like.
At Carlin I had wanted to use the same type of setup but there were just too many turnouts so I made up similar panels but with just the knob and a simple designation for each turnout. These are spread along the edge of the layout with signals being sent to a central display panel with a track diagram and LED's to show status. Using the same type knobs help to keep the same look as the controls in Battle Mountain.
At some locations where a pair of turnout controls are close together double panels were used.
This is the display panel which is in the middle of the Carlin section. The designations used are E for East 1-5, W for West 1-5, and S for Spur 1-5. The spur locations have only a single LED which is bi-color with green being aligned and red being diverging just like at Battle Mountain. The remaining turnouts each have a pair of green LED's to show turnout position. Turnout W5 was in a place where the manual controls were not practical so it got an MP5 turnout motor and a toggle switch on this panel.
Tuesday, August 2, 2022
Grade crossing in Carlin
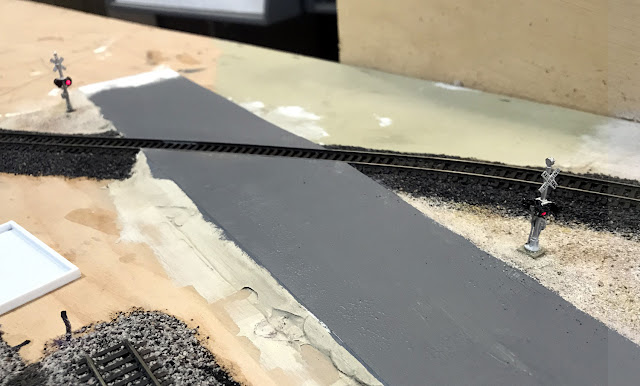
In the real Carlin, there are a pair of multi track grade crossings, one at 4th street and another at 10th street. I wanted to keep my small modeled yard clear of any grade crossings but did find a spot where Main street crosses the Western Pacific line to include one of these interesting features.
 The grade crossing that I had set up in Battle Mountain a few years ago was no longer working correctly but the signals themselves were OK so I transplanted them to Carlin. These NJ International signals have lights on both sides and as this crossing would be visible from both sides I wanted to use them here. When I rebuild the crossing at Battle Mountain I plan to scratch build some signals that will only have lights on one side as they can only be seen from the front. In Carlin I am using the crossing controller from Azatrax with the IR transmitter and receiver being in between the ties using the reflective mode. For the sound I am using the ITT Products grade crossing module. These circuits are mounted under the bench work.
The instructions that same with the sound module recommends a speaker with an 8 ohm input impedance. For about $5.00 each on Amazon I found some 2 inch, 8 ohm speakers. I am impressed with the sound quality from these.
These speakers are also small enough to hide in a small structure. This one will be in a 3D printed house that is nearby the crossing. I still need to get the part between the rails done and also some markings on the road.
When I set up this signal, this section of bench work was still on the saw horses and everything worked great. After installing the section into the layout the sensors started to get false triggers. What was happening was that the invisible IR beam was reflecting off the bottom of the cabinets which are 17 inches above the track. I taped up some of the same black craft foam that I used on the roads and that seems to have solved the problem. So I may need to either attached these foam sheets more permanently or paint the bottoms of the cabinets a flat black in this area.


