Working on those drop bottom dump trucks got me to thinking about adding some Maintenance Of Way trucks to the layout. Then seeing this photo of an old SP boom truck on a truck collectors website inspired me to try to create something like this in N scale.
As a starting point I used one of the Athearn C cab tractors that I had. The cab was removed and the frame was cut into 3 pieces. All three pieces were then glued to a .125 square tube with CA.
The back side of the cab was carved out as shown in this photo so it would fit on over the square tube.
This is what the model looked like with all of the pieces finished but before painting. Scraps of styrene, steel wire, and aluminum tubing were all used to construct the boom, bed, and shelter.
The cab, shelter, bed, and boom were each individually air brushed before assembly on the chassis. The smallest SP decals I had were from the Microscale bridge set but I hope to soon have some smaller ones.
Some weathering and a few items thrown into the bed. The boom cable is some black thread, some small copper wire rolled up and painted rust simulates a coil of cable, and some small chain piled up and held with CA holds down the end of the boom cable.
This was my first MOW vehicle project but I do plan more.
Monday, August 6, 2018
Building a 1970's era SP MOW boom truck
Labels:
kit bash,
motor vehicles,
MOW,
scratch building,
Southern Pacific
Wednesday, August 1, 2018
Trucks for the Barite industry
The Barite mines that supply the ore to the crusher in Battle Mountain are located at least 50 miles away. The ore is brought to the crusher by drop bottom dump trucks and I needed a couple of these to make the scene complete.
I purchased a pair of drop bottom trailer kits from Shapeways designed by an N scale modeler whose blog I have been following for several years, the N Scale Addict.
These are triple axle trailers and the tires come in a strip of 6. I painted the whole strip first, then cut them off and installed them on .020 steel wire axles, then touched up the paint.
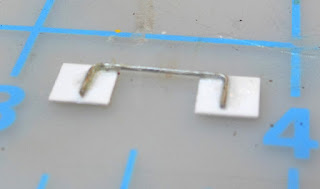
I made mud flaps for each trailer by gluing a small square of styrene to a staple then this assembly was painted grimy black before being installed on the back of the trailer.
Thinking that a 3 axle trailer would need a heavy duty tractor to pull it I choose these 2 from my collection. The pivot point where the trailers connect was modified on each tractor by gluing a plastic disk with just the right sized hole drilled in it.
Here are both trailers hitched to their tractors after being air brushed painted a light gray and the axle assemblies installed.
There was a small horizontal groove on the back of the trailer that I made a bit larger with file. The wire support for the mud flaps fit right into this and then the gray paint touched up and the entire trailer got some weathering wash.
One of the trailers got a load of Barite and the other one is empty. To simulate the load I used the same unstained Woodland Scenics small talus material I had used on the conveyors.
The loaded truck and trailer are shown here at the unloading pit for the crushing facility.
Then it's back to the mine for another load.
These are the first vehicles made specifically for this layout, there will be more.
Labels:
Battle Mountain,
details,
motor vehicles,
scenery
Subscribe to:
Comments (Atom)


