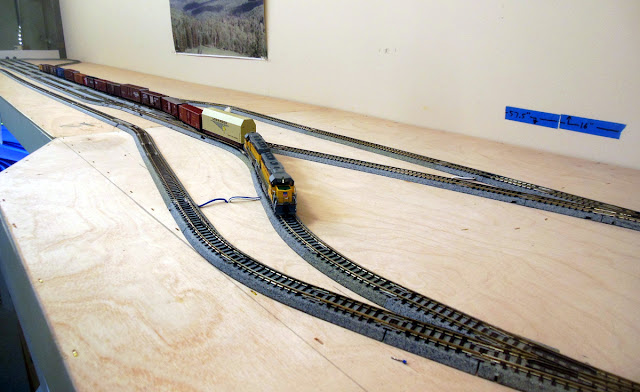
Thursday, March 11, 2021

Kit bash of a Micro-Trains HUMVEE

Recently I purchased two of the Micro-Trains heavy duty DODX flat car sets.  Each set had 3 flat cars and a number of military vehicles.  Between the two sets I got a pair of M1 Abrams tanks, a pair of M270 rocket launchers, and 9 HUMVEEs.

The Micro-Trains HUMVEE is a nice model of the 4 door sloped back version but there are several versions of this vehicle as shown in the photo below which is a screen shot from a YouTube video.  I wanted a variety of HUMVEEs for my military equipment train so set out to modify a few of them.


Because the model is injection molded it is durable and will tolerate quite a bit of modification.  The basic parts are the body, the chassis, and a clear window insert.  This is how I made a 2 door pickup version similar to the one in the far right of the above photo.  On the body he upper part of everything behind the front doors was removed to create an open truck bed.  A solid panel was installed on the back of the shortened cab and the turret hatch on the roof was sanded smooth.  Benches and side boards were added along both sides of the bed.   On the chassis a raised platform was installed to fit inside the bed.  The clear plastic insert was cut to fit inside the smaller cab.


This is what the almost finished vehicle looks like after painting and weathering.  I did not add all of the details as I felt they were going to be too delicate for handling.  I did add the front screen, the snorkel, and the spare tire.  And I still do plan to add some mud flaps.


And here is another photo showing one that I assembled, painted, and weathered without any modification.  I am planning several more versions of the HUMVEE as I build up my military equipment train and some of those will be subjects of future posts.


Wednesday, March 3, 2021

Finishing the annual Trainboard layout party

Since the middle of December I have been involved with the annual trainboard.com layout party.  Last Sunday was the end of this years event.   This is a thread on the board that last for about 10 weeks during the winter where participants declare a particular project on their layouts and then post regular updates on the progress.  I have been participating in the event for the past several years and each time have expanded the layout.   This year I had just started the Palisade Ranch expansion when the party started with the intended goal to have the expansion mostly completed and the main line open for operation.  I was able to accomplish what I set out to do and perhaps a bit more.   This is what the Palisade Ranch area looked like when I started.

And this is what it looks like now. Still quite a bit of scenery to work on but the basic construction is done and trains are running. The lower photo shows where the tracks exit the tunnels on the other side of the hill and cross the doorway lift bridge.


Thursday, February 18, 2021

A caboose train video just for fun

Lately I have been enjoying the YouTube channel called "N-Scale Union Pacific Evanston Subdivision" done by Roy Smith.  On a recent episode someone had challenged Roy to run a train with all cabooses but he has no cabooses as he models the modern era.

That got me to thinking about all the cabooses I have.  Some do run on my mid 1970's to 1996 era layout but many others have never been run on the layout.  So I thought it would be fun to get them all out and run them as a special train.   The train was pulled by an F3A/B pair and I made a video of it.

https://www.youtube.com/watch?v=2qD_q3VlAUo


Thursday, February 11, 2021

The main line has reopened once again

After installing the bridge and the track on the westbound / Southern Pacific line, the main line of the layout is again opened.  Test trains have been running with all the different type of cars and one of those is seen in this photo.  There is still work to do on the scenery but it is great to be able to run trains again.

On the other side of the lift bridge in an area that will someday become Carlin, a new return loop and stub end staging yard has been setup with Kato Unitrack.  The 4 stub end tracks are equal in length to the main staging yards below and the passing siding in Battle Mountain.   Using a double crossover at the throat of the yard allows a train to enter or leave any of the 4 tracks.  I am trying this arrangement out here because this would fit in what will someday be the permanent east end staging yard above Weso and I want to see how I like it.


Wednesday, February 3, 2021

A different finish for concrete

As mentioned in the last post on January 26th, I did something a little different to finish the bridge abutments for the Palisade Ranch area.  I have never been really happy with the look of my concrete surfaces and have been experimenting with different colors and techniques.  I ordered just about every shade of light gray Model Master acrylic that I did not already have and settled on # 4762 Light Ghost Gray (F) as a base color.   The tunnel portals were also repainted in this color and one of them is shown below.

I saw in a Youtube video someone using a technique of splattering tiny drops of white and black paint onto a surface to give the appearance of the aggregate that can show up in a concrete surface.  So I gave it a tray.  It took some practice and some time but I found the results to be satisfying.  Besides white and black I also added some darker shades of gray and some brown.   One of the finished bridge abutments is shown in the photo below.

After some weathering with acrylic washes the same bridge abutment looks like this and I am ready to install it on the layout.  Once it is locked into the right position I cover it with painters tape to protect it while I am adding scenery materials around it.


And here is that same bridge abutment after being installed and scenery material worked around it. 


Sunday, January 24, 2021

Palisade Ranch is shaping up

It's been a few posts since I have directly mentioned any progress on the current layout expansion and a lot has been done since then so I thought it was time for an update.    Almost all of the land forms along about 4-1/2 linear feet of the layout under construction have been completed.  The building of the mountain side that the tunnels go into will be done after the track has been installed and tested.

Bridge abutments have been made and installed for the two bridges near the Palisade Tunnels.   I did something a little different in finishing these bridge abutments and the details of that will be in a future post. 


Much of the scenery along the back edge of the area is almost done and the concrete trestle has been installed.   The front edge will have to wait until I can get some more tempered hard board for the fascia. 


The track assemblies for both those bridges have been finished.  The bridge in the photo below will have Micro Engineering bridge track with guard rails.  The other bridge will use Central Valley bridge ties put into a section of Micro Engineering track.


Monday, January 18, 2021

A layout video of sorts

Having always enjoyed seeing layout videos I wanted to create some for my own layout.  What has kept me from doing this was that I could not find a video editor that was easy enough for me to use.  Over the past several years I had tried several both purchased and free and I found them all rather hard to learn and tedious to use. 

As a sort of new years resolution I was determined to try again to find something I could use.  After looking at a few more editor programs I found something called Shotcut.  It was a free download but what made it work for me were the many tutorial videos on youtube that are presented by many different people.  After finding some presenters that spoke in an understandable way and did not go too fast, I was able to go back and forth between the program the video tutorials until I caught on.

Not having any good videos of the layout right now I put together as a first project a short slide show of still photos including captions and some background music.  This allowed me to practice working with most of the same functions that would be in an actual video.  When this current layout expansion is done and the main line is opened I plan to get some videos.  So here's the link to the video slideshow:


Tuesday, January 12, 2021

Electrical considerations for a lift bridge

When adding a removable section of tracks to span a gap in the layout such as the entry door to the layout room some thought has to be given to a few problems. 

How will any needed wiring pass through the bridge ?

My train room was built in the back half of a garage that is about 70 years old.  The concrete floor was in poor enough condition that I elected to build a raised floor which ended up being about 9 inches above the concrete garage floor.   Anticipating that layout wiring may need to span across the doorway I included a 1 inch diameter electrical conduit that connects each side of the doorway.  This conduit travels down the wall on each side and under the ramp that leads from the garage floor at the door up to the raised floor if the layout room

A pull line had been left in this conduit when it was installed so it was easy to pull in an 8 conductor, 18 gauge cable at this point in the layouts development.  Each end of the cable was terminated on a terminal strip.  A new pull line was also pulled in at the same time so future cables can be installed the same way.


How are the tracks on the bridge itself connected to track power ?

In this case there are 2 tracks that go across this bridge with each being connected to a different DCC Specialties PSX-1 DCC circuit breaker.  While there are special door hinges used for electrical door locks that could be used, these are quite expensive so I am just using 4 flexible wires.  These wires are 18 gauge but are made up of many smaller strands and that is what makes them more flexible.  The ends are connected to terminal strips so can easily be replaced if movement eventually causes any of them to break.  


What prevents a train from approaching the bridge when the bridge is open ?

At the end of the bridge that does not have the hinge,  there is a magnetic switch within the frame that the bridge fits into and it's activating magnet that is within the end of the bridge itself.  The bridge has to be fully closed for the switch to activate.   


The magnetic switch controls this group of 5 single pole relays.  4 of the relays control track power, 1 for each rail of 2 tracks.  When the track is installed, it will have an additional isolated gap a few feet from either side of the bridge.   This will stop a train from approaching the bridge when the gate is up.  The 5th relay will be to control a warning light outside the door indicating that the gate is lowered.


Sunday, January 3, 2021

Adding wifi throttles to the layout

I had been considering adding another utility throttle when the Digitrax LNWI caught my eye.  The LNWI is a Wifi module that connects to the Loconet and will allow a smart phone with a throttle app to be used as a throttle.   These cost about the same as a wired UT4 throttle and will support several smart phone throttles.


There was nothing to installing this new module, I just plugged in the power and connected it to the existing Loconet and it was ready to go.  There are several free throttle apps available and the one I am using is called WiThrottleLite.  It worked the first time I tried it, no problems.  I found the WiThrottleLite app very easy to use and it also has a flashlight function built in which may be handy when uncoupling those cars in the shadows.